8 perspective tips for macro photography
Articles | Macro photography tips
By Frank Pichardo. January 2019.
Meet the Chocoan Forest-Toad (Rhinella alata), a species that occurs in the Chocó rainforest of Ecuador, Colombia and Panama, from 20 to 1500 m above sea level… quite a range!
I photographed this toad while doing a herpetological survey in a remote area in northwestern Ecuador, in an area recently protected by Fundación Jocotoco. It was daytime, around 10:30 am, and the toad was calmly sitting on a leaf besides a permanent creek in primary forest.
Having such a relaxed and photogenic subject encouraged me to explore a variety of photographic perspectives and techniques, which I here hope to share with you to help your creativity run wild.

Canon EOS 5D Mark III + Canon EF 100mm f/2.8L IS USM Macro Lens. 1/60 sec. f/5.6. ISO 800.
1. The animal in its environment. This was the first picture I took. The toad was about 10 meters from the path and surrounded by thick vegetation. It was important not to be clumsy while getting closer because of the myriad creatures that could pose a threat to a photographer, including bullet ants and wasps. Safety is paramount. Once I was sure the environment was safe, I started paying attention to the subject and how it might stand out against its environment. I was surprised by the orange and reddish coloration of this Rhinella alata, which stood out against all the greenery. However, I realized there was something more attractive about this little jewel. With some patience and measured breathing, always vital in wildlife photography, the idea of getting a better shot was on the way.

Canon EOS 5D Mark III + Canon EF 100mm f/2.8L IS USM Macro Lens. 1/80 sec. f/6.3. ISO 1600.
2. Portrait shot. After securing the toad-in-its-environment shot, I looked around to make sure I was not disturbing anything. The toad could easily jump from the leaf at any time, potentially ending the encounter. Therefore, I decided to carefully get close using the same perspective as in the previous picture, but just closer. My settings were set to create a shallow depth of field. I did not set my aperture to f/2.8 because the background would be too flat, so I used f/6.3 instead. I pumped up the ISO to 1600, which is a possibility while using a full frame camera that is well-suited to handle image noise.

Canon EOS 5D Mark III + Canon EF 100mm f/2.8L IS USM Macro Lens. 1/40 sec. f/6.3. ISO 1600.
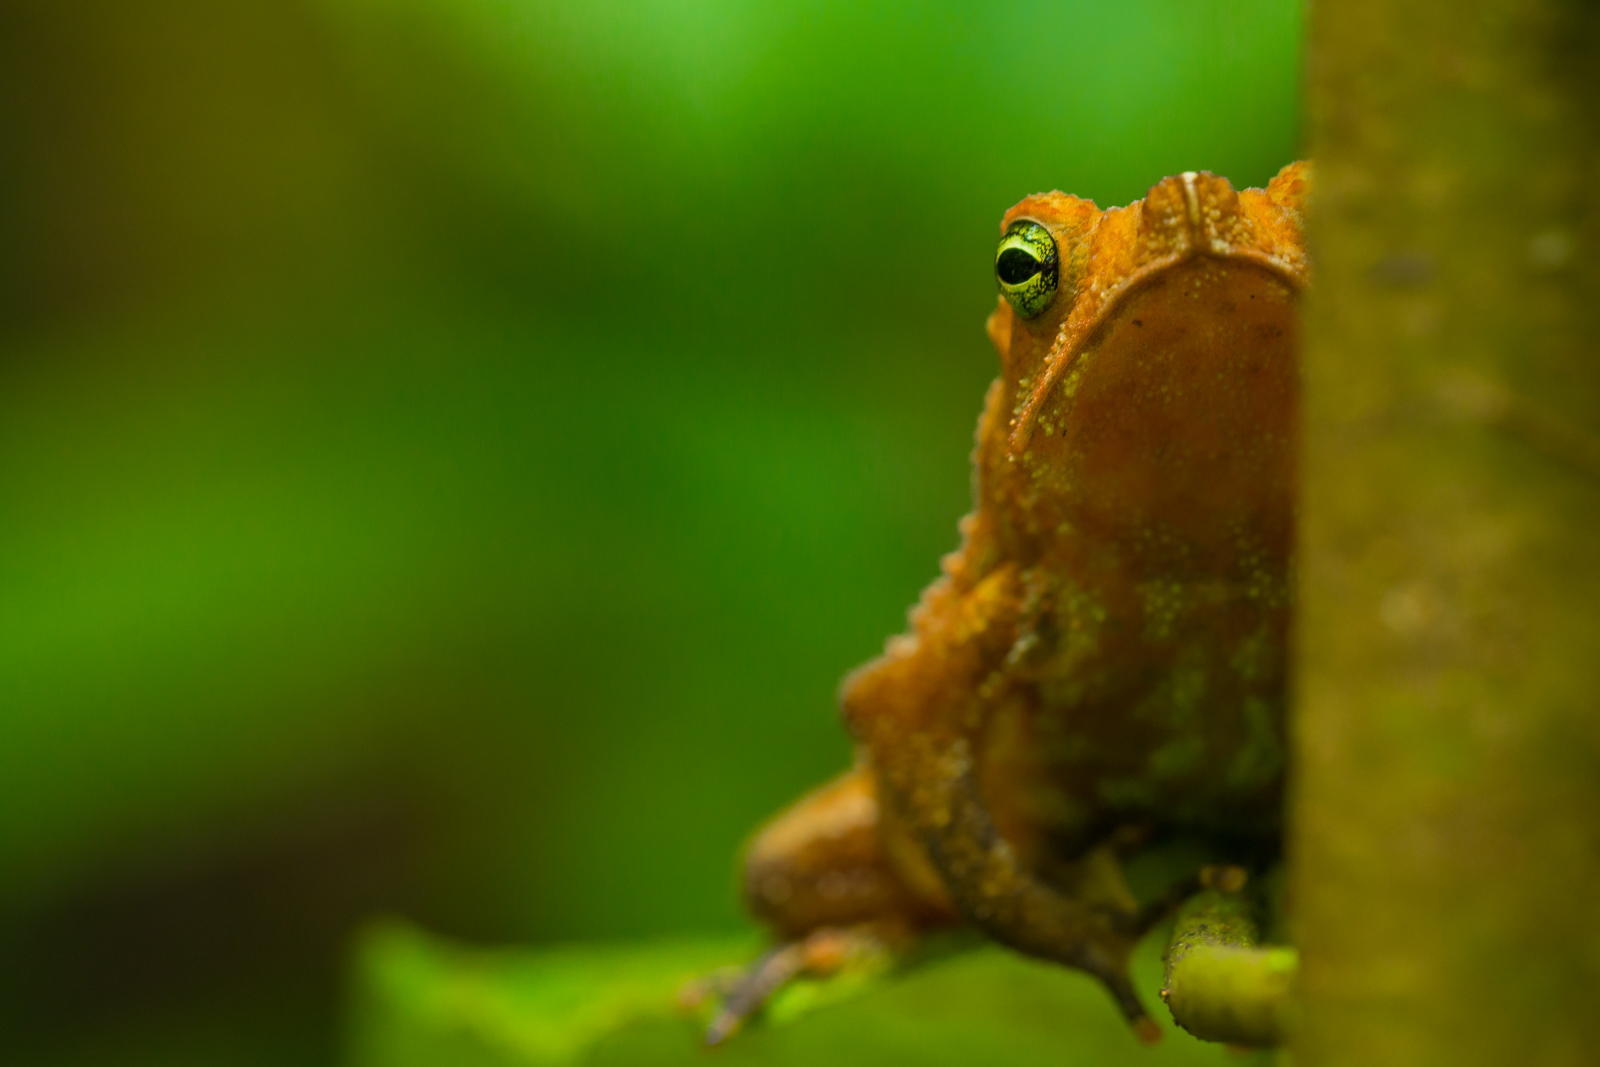
3. Leaf foreground shot. After getting the essential portrait shot, I figured the next step would be to make the toad stand out a bit more. For this purpose, I focused on the eye and photographed through a hollow leaf. The shot came along nicely. This technique can help when the background is messy or distracting, as in this case, where the background was just 20 cm (8 inches) behind the toad. Using the Canon EF 100mm f/2.8 Macro was a tremendous help. It is a sharp lens with great image stabilization. Even if you have shaky hands, the lens can correct for that. Some of the analogous Nikon or Sony models give good results too.
Canon EOS 5D Mark III + Canon EF 100mm f/2.8L IS USM Macro Lens. 1/80 sec. f/6.3. ISO 1600.
4. Frontal shot. One of the most effective but least used tips in wildlife photography is to add personality to the shot. One way to do this is to photograph the subject’s eyes from the front. In this example, even though the toad had kind of a sad face, I photographed it right from the front to trigger a connection with the viewers. I did not change the camera settings since I wanted to get other angles before the toad decided to leave.

Canon EOS 5D Mark III + Canon EF 100mm f/2.8L IS USM Macro Lens. 1/40 sec. f/5.6. ISO 1600.
5. Low perspective shot. After doing a quick 360 inspection around this toad, I realized the backlighting created an eye-catching shadow of the toad’s toes. There is a big dilemma in photography. We are encouraged to photograph small subjects at eye-level. However, since I work with a great scientific team, I learned that going beyond the eye-level shots and photographing from different angles is important for species identification. In the example above, you can see the distinctive belly pattern of this species. From this image, you can also get a better idea about the size of the toad by comparing it against the foliage.

Canon EOS 5D Mark III + Canon EF 100mm f/2.8L IS USM Macro Lens + 1/16 flash. 1/125 sec. f/13. ISO 500.
6. Flash shot. A couple of things led me to try something different and use flash in this picture. First, the toad clearly started to notice my presence, and one of my goals was to leave the animal in peace. Second, the sun was getting brighter, creating too many highlights in the background. The way to deal with these challenges was to use an off-camera flash with a soft-box. But there was an inconvenience. The soft-box was too big to get close to the subject without moving the leaves around. As an alternative, I wrapped a paper towel around the flash to make the light softer. I directed the light from the top, and a few leaves helped diffuse the light. One important element of the subject became noticeable: the toad’s eye color.

Canon EOS 5D Mark III + Canon EF 100mm f/2.8L IS USM Macro Lens + 1/16 flash. 1/125 sec. f/13. ISO 500.
7. Minimum distance shot. This was the last picture. I set the lens on manual focus and on minimum focusing distance. The plan was to isolate the eye and make it the center of attention. I did not hesitate to use the same settings from the previous photo for this one. Another thing I did was tilt the camera to avoid certain elements from interfering with the subject, like the branch on the left. Otherwise, this could have overlapped with the toad’s head, making the image less attractive. With the images taken, I looked around to see if I could find more creative angles. If not, the business was done.

Canon EOS 5D Mark III + Canon EF 100mm f/2.8L IS USM Macro Lens. 1/25 sec. f/5.6. ISO 4000.
8. Final combo. On my way back to the station, I saw this cute couple of toads. I was surprised by the different coloration between the male and the female. They were getting busy, too! This mating behavior in amphibians is known as amplexus. Documenting this was a must. One limitation was that rain was almost falling and the forest interior was getting dark. Before using other gear or setting, I secured the shot. I then increased the ISO and used a slow shutter speed to make this possible. If you ever need to use ISO values of 10000 or higher, do it! It is better to get a noisy photo than no photo at all.

Canon EOS 5D Mark III + Canon EF 100mm f/2.8L IS USM Macro Lens + 1/128 flash. 1/50 sec. f/3.5. ISO 1600.
After I secured the first shot, I decided to get my bum wet and go eye-level to make the photo more interesting and the background less distracting. However, the rain arrived (look at the water drop on the left of the frame). Since it was an open area, mounting the big soft-box was a wise idea. With the extra lighting source, I did not need to keep the ISO high. That said, the idea was not to make a photo with that “flashy” look. Therefore, I set my external flash to minimum power. The result was better.
Final thoughts. Every time, while looking at a good photo, we try to get to a similar result. Failing is part of the process. Looking at images that are not perfect is an under-appreciated part of the learning process that let us understand mistakes in composition and technique. Flawed images trigger our creativity. Let you imagination run wild. Start with something stationary like a bromeliad or a friendly toad, and then master more advanced abilities to photograph something more challenging, like a quick lizard or a fleeing snake.
For me, photography goes beyond showing the animal’s beauty. It is about showing it in such an original way that it can become a trend for conservation or inspire people to get to explore nature, where real life is going on.
Want to learn more? Join our crew in the field and learn directly from them.
Follow Frank.